Drop an image here
or click to choose
JPG, PNG, WebP
About the Texturizer Effect
Last updated 21 August 2026
How the effect works
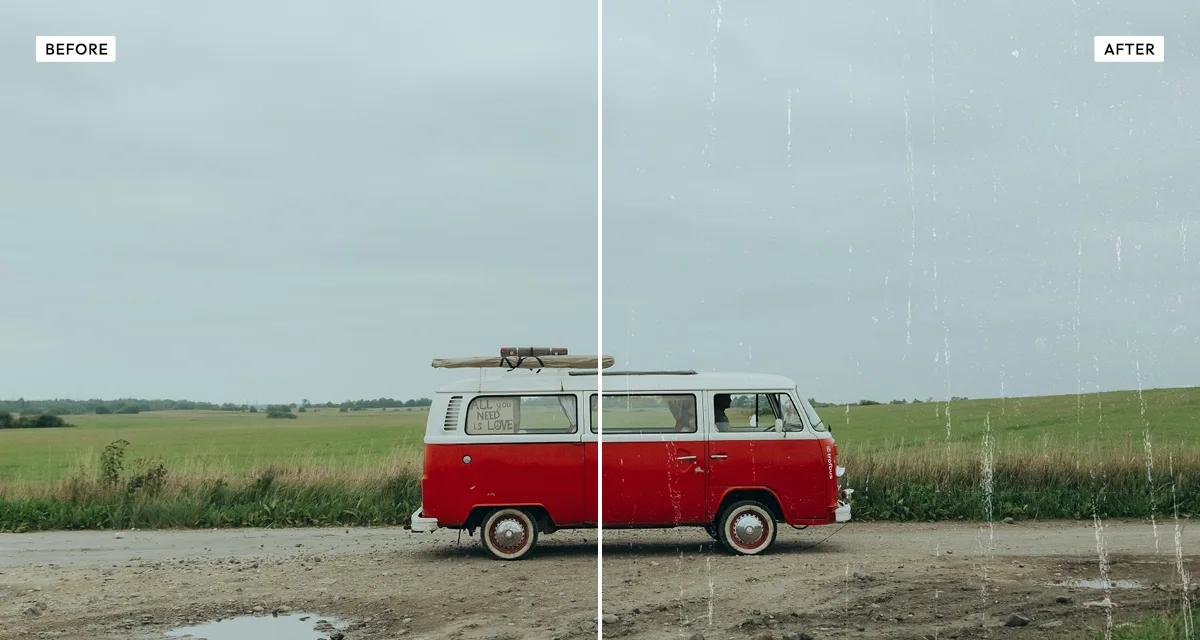
A photograph that has existed as an object picks up evidence of it: the paper creases, the emulsion scratches, dust settles into the surface, chemicals stain. Digital images have no such history, and that absence is part of why they can look sterile at large sizes. Overlaying a scanned surface puts the history back.
The blend mode matters as much as the texture. Multiply keeps only the dark parts of the texture, so scratches and dirt land on the image while the light areas vanish — the right choice for grime. Screen does the opposite, keeping only the bright parts, which suits dust flecks and light leaks. Overlay and soft light keep both but respect the underlying image, which is what you want for paper grain that should follow the photograph rather than sit flatly on top.
Because the textures are photographic scans rather than generated noise, they carry the irregularity real damage has. Procedural scratches repeat and the eye notices at large sizes; scanned ones do not.
What each control does
| Control | Range | Default | What it changes |
|---|---|---|---|
| Texture | 11 scans | 02 | Eleven scanned surfaces, from fine paper grain to heavy scratched grunge. |
| Blend mode | 6 modes | overlay | Screen, multiply, overlay, soft light, hard light or lighten. See the tips below. |
| Intensity | 0–100 | 60 | How strongly the texture shows. Above 80 the texture starts to compete with the photograph. |
| Brightness | −100 to +100 | 0 | Exposure of the underlying image. |
| Contrast | −100 to +100 | 0 | Contrast of the underlying image, applied before the overlay. |
| Desaturation | 0–100 | 0 | Removes colour from the image. Raising it lets the texture carry more of the character. |
Tips
- Use multiply for dirt and scratches, screen for dust and light leaks, and soft light for paper grain that should follow the image.
- Keep intensity around 40–60. Above 80 the texture stops being an overlay and becomes the subject.
- Raise desaturation if the texture and the photo fight each other on colour — a muted image carries heavy texture far better.
- Textures suit images with large simple areas. A busy photograph plus a busy texture reads as noise.
Common uses
Album and book covers, poster and zine design, packaging mock-ups, editorial illustration, mood boards, photographic art prints, and any image that needs to feel like a physical object rather than a file.
Frequently asked questions
What is the texturizer effect?
The texturizer effect overlays scanned physical textures — scratches, dust, paper grain, creases and grunge — onto a photograph. It offers eleven real scanned surfaces and six blend modes, so you control how the texture interacts with the image instead of accepting a single fixed result.
How do I add texture to a photo?
Overlay a scanned surface and choose the blend mode to suit it: multiply for dirt and scratches, screen for dust and light leaks, soft light for paper grain that should follow the image underneath. Keep intensity around 40 to 60 — above 80 the texture stops being an overlay and becomes the subject.
How do I make a digital photo look like a physical object?
Give it evidence of having existed: paper fibre, creases, scratches, dust settled into the surface. Digital files have no such history, and that absence is much of why they look sterile at large sizes. Scanned textures work better than generated ones because real damage is irregular in ways algorithms are not.
Is the texturizer effect free to use?
Yes. The texturizer effect is free, and you can adjust every setting and preview the result without signing up. Credits are only needed to download at full original resolution; the preview and standard-resolution download cost nothing.
Do I need to upload my photo?
No. The texturizer effect runs entirely in your browser, so your original photo is processed on your own device and never leaves it. If you are signed in and save a full-resolution download, the rendered result — not your original — is stored in your private account folder, encrypted with AES-256, and deleted automatically after 30 days.
Which blend mode should I use for texture overlays?
Use multiply for dirt and scratches, since it keeps only the dark parts of the texture. Use screen for dust and light leaks, since it keeps only the bright parts. Use overlay or soft light for paper grain that should follow the photograph underneath rather than sitting flatly on top of it.
Are the textures real scans or generated?
They are photographic scans of real surfaces, not procedurally generated noise. That matters at large sizes: generated scratches repeat in ways the eye picks up, while scanned damage carries the irregularity of the real thing.
Can I use the texturizer effect on client or commercial work?
Yes. Images you create with the texturizer effect can be used for personal and commercial projects, including client work, packaging and merchandise. Full terms are on the licence page.
Related effects
For aged tones plus texture in one pass, see Vintage. Grainy Film Poster supplies heavy grain instead of surface damage, Photocopy Scan adds photocopier grunge, and Old Newspaper prints the photo onto aged paper.